Okay, I’ll admit it; I’m a sucker for elegantly crisp sunstars. I may go so far as to say that I’m addicted to them; not in a shady, I’ll break into your house for prescription meds kind of way, but more like if it’s readily available I’m happy to imbibe sort of way. I especially like using them in my landscapes to create an additional element of interest, particularly when the cloud gods are punishing me for previous transgressions and there’s nothing but blue sky overhead. However, like all things fun and sinful, too much of a good thing is still too much (except of course tequila, just ask George) so you should be careful not to overdo them or use them in excess for fear your portfolio will start to look a little gimmicky.
Before I risk offending anyone else with my slightly off-color attempts at humor, here are my 5 tips for creating killer sunstars in your images.
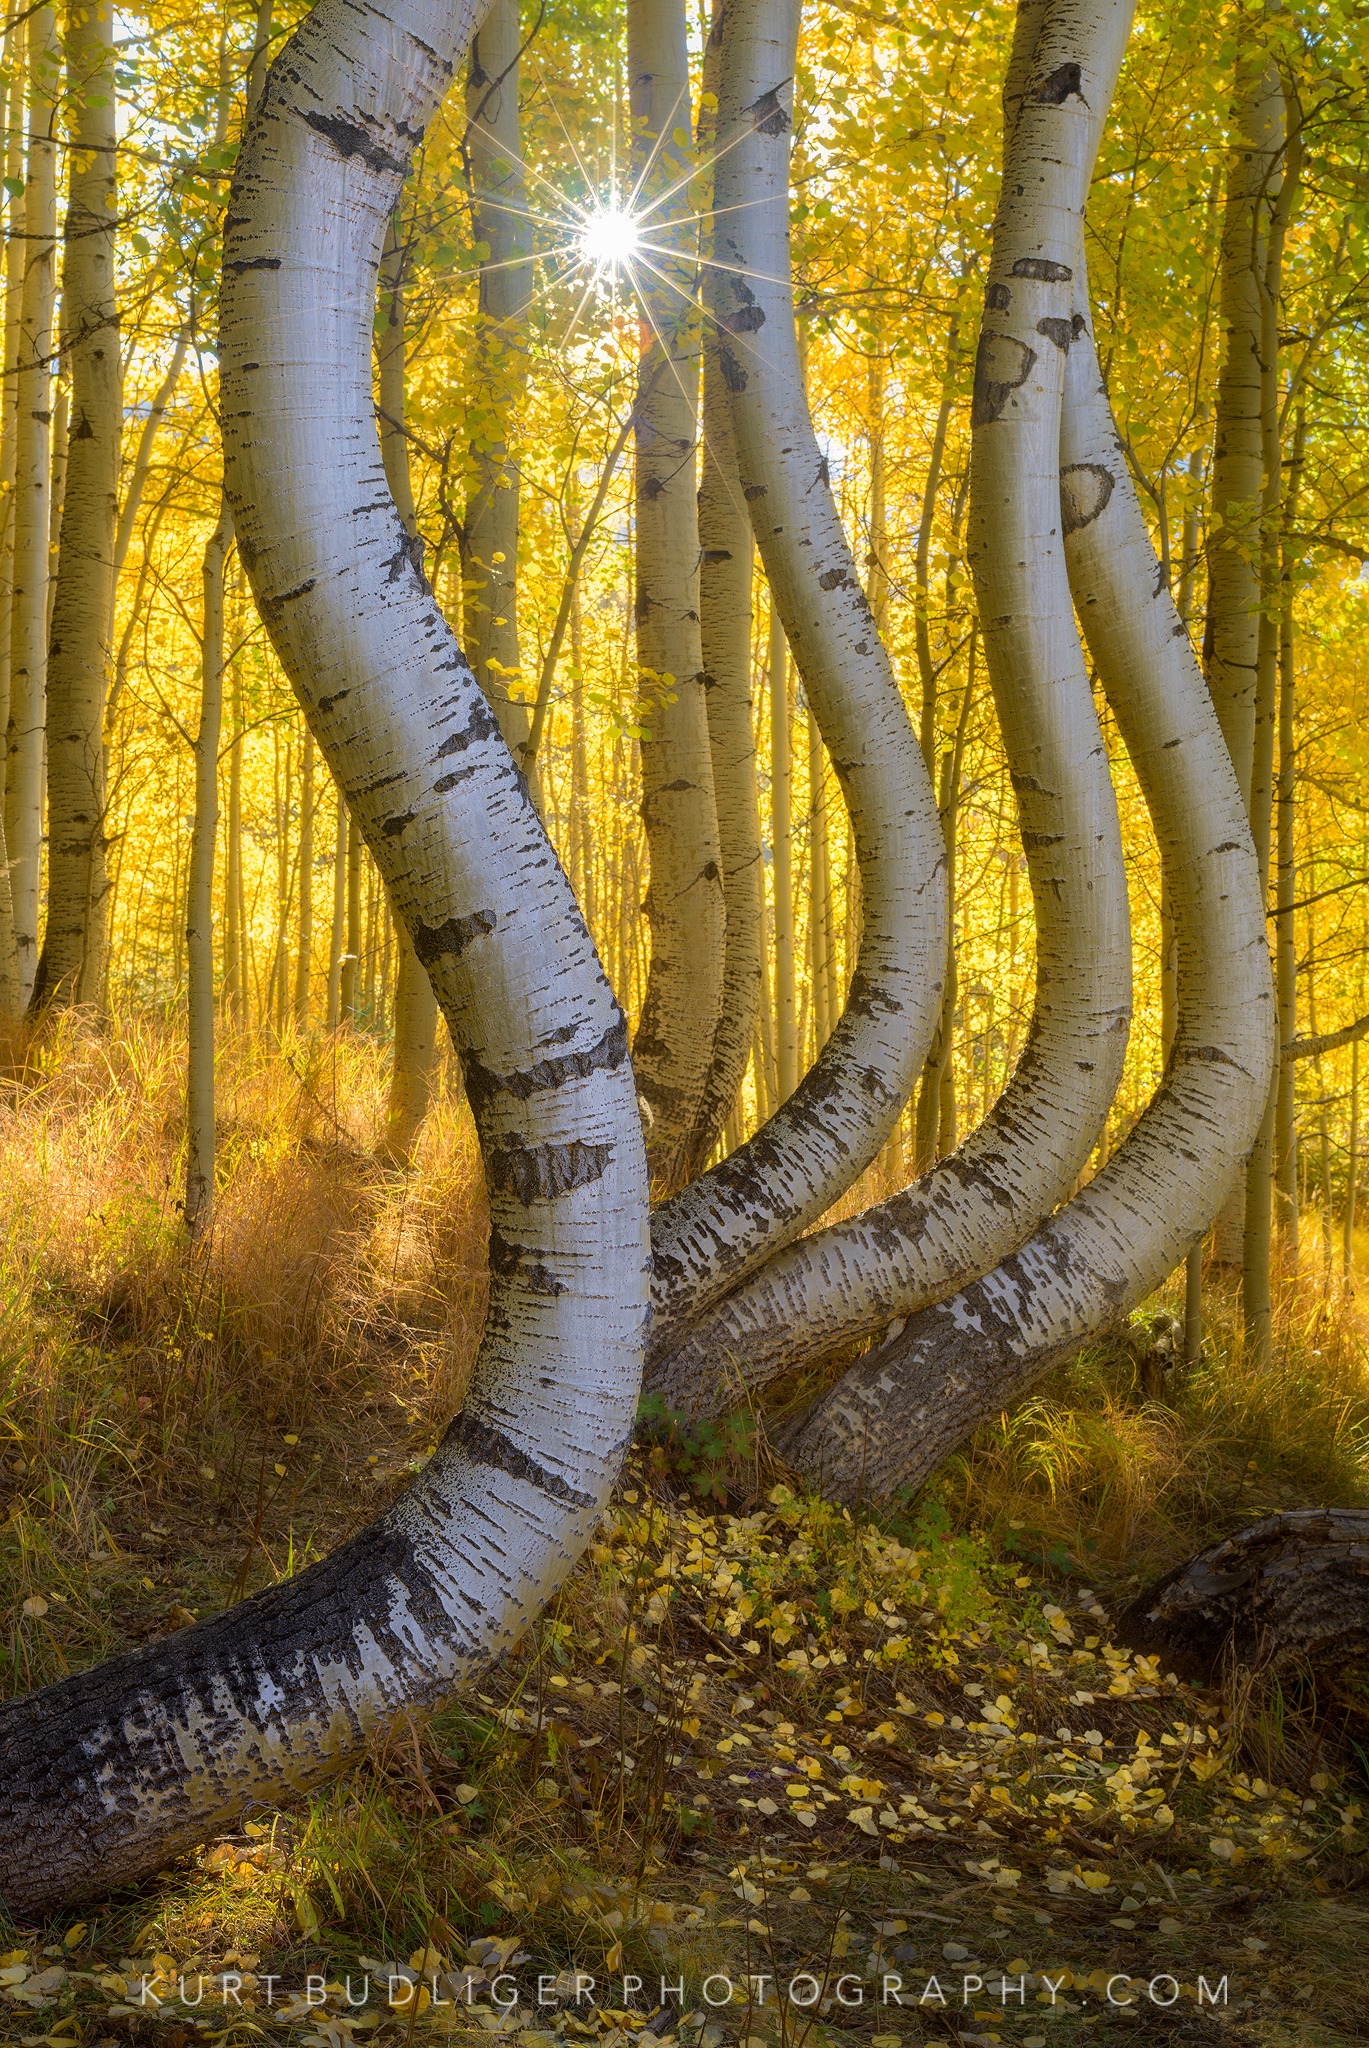
“Curves,” San Juan Mtns Colorado Nikon d850 62mm f16 @ 1/4 sec ISO 100
1) Small Apertures – generally speaking, you’ll have to use a small aperture, something like f16 or f22 to make fully-formed crisp sun stars. Wider apertures like f2.8 or f5.6 simply don’t cut it on most lenses. The starburst is caused by light passing through a small aperture and being diffracted (or spread out) across the aperture blades in the lens. The more blades and the less curved they are the better the star. Not all lenses are created equally, see #5 below.
2) Hard Edge Obstruction – Although you can make a nice star when shooting the sun high in the sky, I generally find I get the best results (i.e. small size with minimal flare) when I play peek-a-boo with the light source. To do this I’ll position the camera so the sun (or other light source) is mostly obscured by some compositional element in my frame – something like a clean horizon, edge of a tree, rock outcrop or building. I find that harder and/or smoother edges yield the best results.
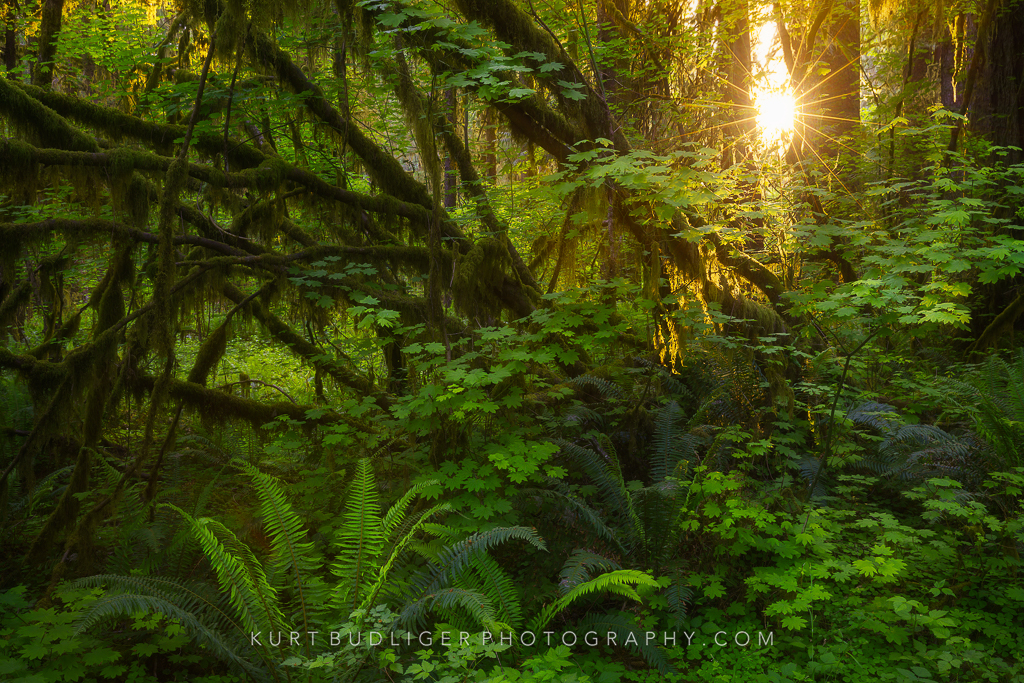
“Forest Light,” Olympic National Park, Sony A7RII 44mm f16 @ 3.2 sec ISO 100
3) High Fidelity Light – In addition to obscuring the light source, I find it’s best to use what I call high-fidelity light, namely light that is pure and clean. When the light is being filtered through high clouds, atmospheric haze or fog the resulting sunstars tend to be muddy and lack clarity. I also like low-angle, warm light around sunrise and sunset for my sunstars.
4) Use Live View to Preview – Once I’ve settled on my composition and am ready to shoot I like to use Live View in conjunction with the depth of field preview button (sorry Nikon people) to preview how my sunstar will look as well as get a sense for how much flare is being produced. You may be surprised to see how much a little shift in camera position (up/down, left/right) can change the size and shape of your sunstar, as well as how much resulting flare you’ve got in the frame. You can also use this method when choosing your aperture as you’ll see exactly what the sunstar will look like. You may not need to stop all the way down to f22 to get the desired effect.
5) Not all Lenses are Equal – Unfortunately this is one area where the gear really does make the difference. Not all lenses make sunstars or handle flare equally. Generally speaking, the higher quality “pro” level glass make better, more defined sunstars than “consumer” level lenses. And even some pro level lenses simply make better sunstars than others. For example, it’s widely known that the Canon EF 16-35 f2.8L II makes one of the best sunstars around, significantly better even than its own predecessor. I’ve had other Canon L series lenses that cover the same range of focal lengths but don’t make very appealing sunstars. Not that this is the sole reason to purchase a particular lens – but it may be a significant consideration for some.
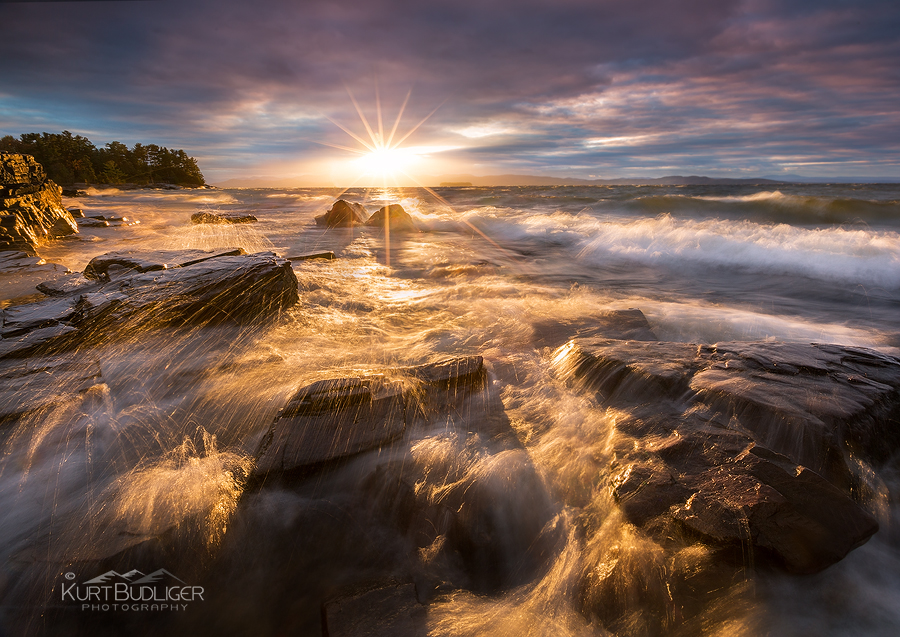
“The Moments Between,” Lake Champlain, VT Canon 5DIII 16mm f22 @ .6 sec ISO 100
Bonus – As a final tip, I recommend shooting an exposure with the light source completely blocked in order to get a frame with little to no flare. You can do this by shooting a frame before the sun pops out or right after it disappears from view, or perhaps even by blocking it with your thumb or hand. You can then use this frame to blend out offensive flare using layers and masks in Photoshop. This can save you a lot of time cloning and healing in post.


This photo is amazing! I was searching for sunstars when I came across this and had to check out the rest of our photos, who also was really good. I also think this text about sunstars was really helpful and I really want to try it out some time and get a proper sunstar photo.
The best sunstar photo I have ever seen. Beautiful work!
Great article, most informative, and I liked your intro as well..
Sensational work sir. You had mentioned the best Canon lens to use for great sunstars but what about Nikon F mount lenses? Which one would you recommend? Even it’s a non Nikon lens.
Thank you
That bonus tip is a nice one! I hadn’t thought about blocking out the sun/streetlight/headlight for compositing later. That’s the sort of tip that wouldn’t have occurred to me, even though I take a lot of sunstar photographs.
Two superb lenses for sunstars are the old, “green ring” Pentax DA 15mm ƒ/4 Limited and the Pentax DA 21mm ƒ/3.2 Limited. Both of these lenses have identical 7-blade apertures. The aperture blades are perfectly straight, so the starburst patterns are very clean and crisp with 14 points starting at ƒ/8. The 15mm Limited is utterly immune to lens flare, but the 21mm Limited can flare a bit in strong sun, so your compositing tip will help me a lot. (Importantly, the current-generation HD “red ring” versions of these lenses have rounded aperture blades, so while they are great lenses, stick with the older green versions for pointy sunstars.)
Also, the bargain-basement Venus Laowa 17mm ƒ/1.8 for micro 4/3 mount also has seven straight aperture blades. Mine produces delightful sunstars. However, this lens is very susceptible to flare, such that you might have to embrace that aesthetic.