I’m naturally drawn to water as a photographic subject. In fact, if forced to choose only one subject to shoot for the remainder of my days I’d be hard pressed to find something I’d rather shoot. Perhaps it’s the fly fisherman in me or perhaps the peace and calm that washes over me whenever I’m around an intimate river or stream. Whatever the reason, I’ve spent countless hours exploring rivers and streams with camera and tripod in tow and thought I’d share some of my favorite tidbits of advice for capturing dynamic stream and waterfall shots.
1) To Polarize or Not To Polarize
No doubt one of the first bits of advice we got as nature photographers extoled the benefits of using a polarizer to reduce or eliminate glare from the surface of vegetation and water. I’m sure everyone owns a polarizer and knows how to use it so I won’t insult your intelligence with yet another lesson in using this magical filter. When I’m out shooting streams and waterfalls it’s definitely a go to filter and more than likely finds its way onto my lens. However, using a polarizer is not an all or nothing proposition. I must say that in recent years I’ve become acutely aware of its subtle influence on the scene if used sparingly and often times find that avoiding full polarization yields the most beneficial results. Full polarization can at times be the way to go, however there are many circumstances in which backing off is prudent. Full polarization at times creates too much contrast between the darker unbroken and broken, “whitewater” portions of a stream. Often times resulting in featureless black water and/or overly bright and distracting amorphous white blobs, the dreaded AWB. Often I attempt to strike a balance between these two extremes by partially polarizing the scene, which leaves some of the glare and texture on the water’s surface. Care should also be exercised if you notice any color, say from a setting or rising sun reflecting on the water’s surface as full polarization can obliterate it completely.
2) Get into it…
…the water that is. The more I work in and around streams and rivers the more I find the best compositions are made from somewhere in the flow. If the weather and water are warm I’ll often wet wade to get the best composition or perhaps a unique perspective if it’s an often-photographed spot. I keep a pair of teva sandals or old sneakers in the car for just that circumstance. Most of the time however the weather and water are not warm enough for wet wading, think autumn and spring in the mountains. So, if there’s a possibility I’ll be photographing a stream I bring a lightweight pair of fishing waders. I lash them to my pack so as not to over heat during the approach. Care should be taken when wading with your gear and if you’re inexperienced I suggest heading out on a few practice runs to get comfortable. Felt bottom boots provide the best traction on wet or algae covered rocks in and around the water. A few states (Alaska and Montana for example) have banned felt soled boots so if you’re traveling to or shooting in these locations you’ll need to leave your felts at home.
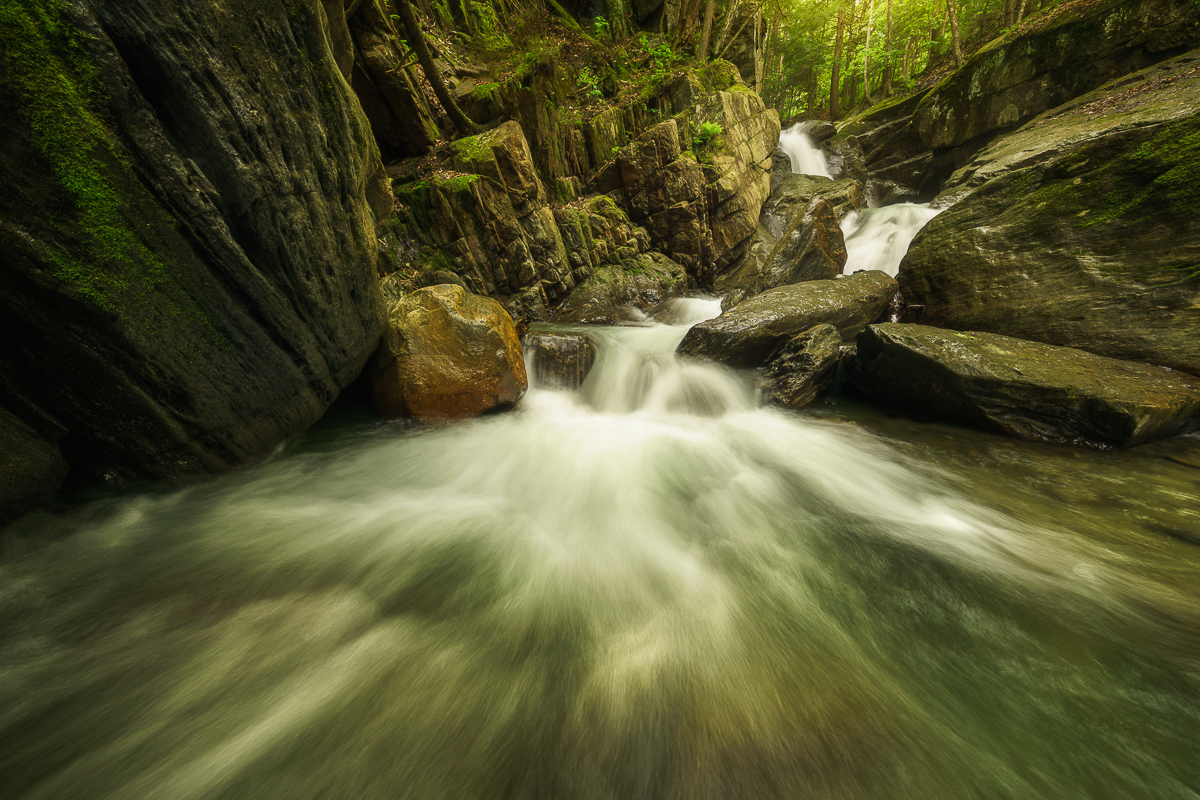
“Honey Hollow Heaven,” Green Mtns, Vermot, Sony A7RII 11mm f11 @ .5 sec., ISO 200, polarizer
3) Control the Flow
Since we obviously can’t alter the flow of a river to our liking it’s important to spend time exploring up and down stream for the best section to photograph. I look for sections with a nice balance of whitewater and smoother surfaces. I also look for a variety of in stream structure like boulders to use as compositional elements. If there is too much white, or the flow is too heavy the resulting affect can be a featureless blob of white (the aforementioned AWB), which is very distracting within the composition. Look for patterns and shapes within the flowing water that will translate into leading lines and accentuate the visual flow without arresting the eye. I also suggest experimenting with different shutter speeds. This is where reviewing images on the lcd is so helpful. For subjects with moderate to heavy flows faster shutter speeds of ¼ sec retain texture and detail in the water while multi-second shutter speeds can result in featureless, “smoky” water. Not to say longer shutter speeds don’t yield pleasing results, they can and do, but it’s important to experiment and make the determination from shot to shot.
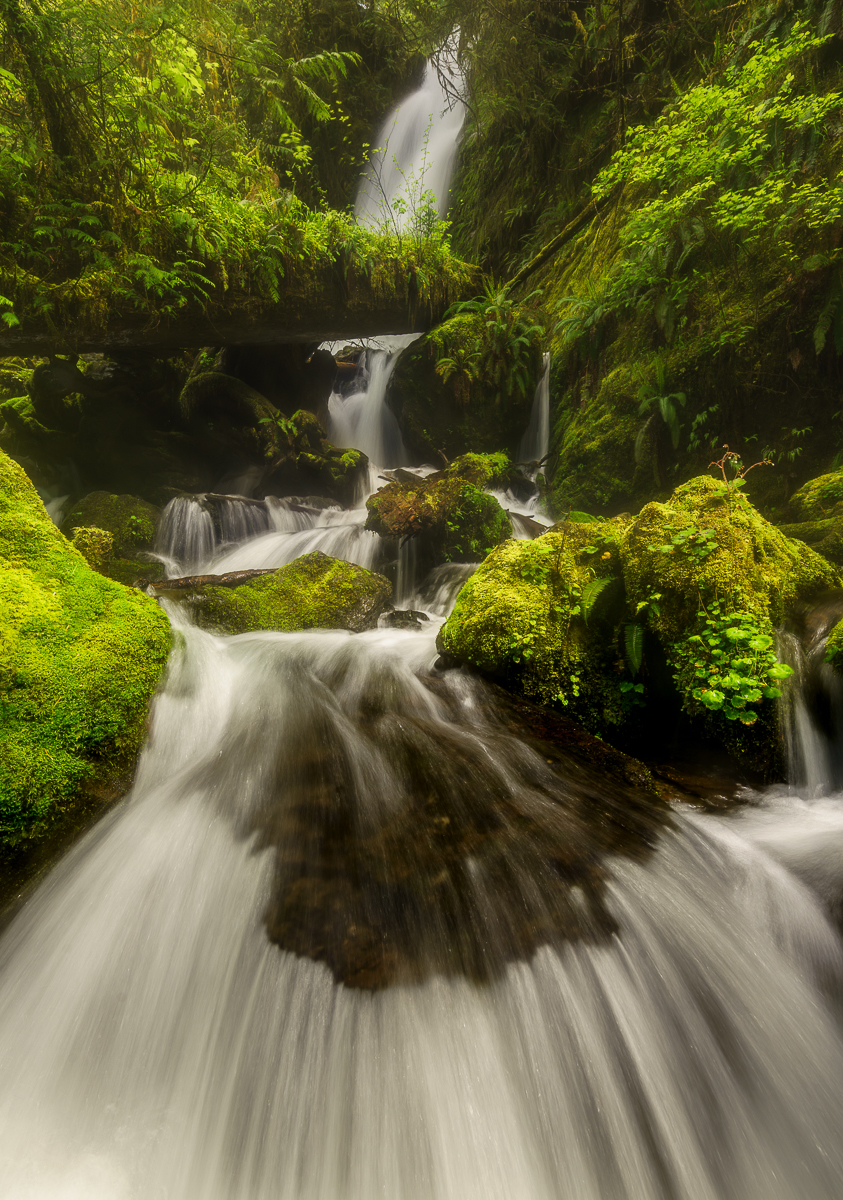
“Confluence,” Olympic National Park, WA, Sony A7RII, 16mm, f11 @ 1/5 sec., ISO 100, polarizer
4) Compose for Depth
When I first started shooting flowing water I think I was more enamored by the neat effect a slow shutter speed had on the water and didn’t pay enough attention to the entire package. The scene has to work holistically, from front to back. Just because you can use a slow shutter speed to create silky water doesn’t mean that the rest of the image works and holds our attention. Streams and rivers are natural pathways and should transport the viewer somewhere. Look for natural bends and S curves in the stream or places where the stream drops some elevation and creates a series of cascades. It’s critical to pay attention to the stream banks and background. Are there distracting elements like hot spots from the sky, snags that have fallen into the stream and create visual obstacles, or worse lines that lead out of the frame? Pay attention to where the water enters and exits the frame, does it lead the viewer out and away prematurely?
5) Timing is everything
I like to shoot streams and waterfalls on overcast drizzly days. Additionally, I try to avoid the gloomiest part of the day when the light is heavy and dark. Ideally I time my shooting for the edges of light, when clouds are breaking up or the overcast is high and thin or perhaps being created by fog or mist in the air. The quality of light is simply better, more radiant and luminous. I also like to shoot when the forest and surrounding landscape are wet. Stream boulders and rocks tend to be very bright and hot, lacking color when they’re dry. You’d be surprised how colorful rocks and foliage get after a good soaking. If there’s been a lot of rain and the rivers are running high I usually head to smaller streams and side channels. The smaller streams tend to run clearer during runoff and are easier and safer to work in. There’s also the added benefit of getting a unique shot since most of these little gems are off the well-beaten path of other photographers, particularly in the National Parks.
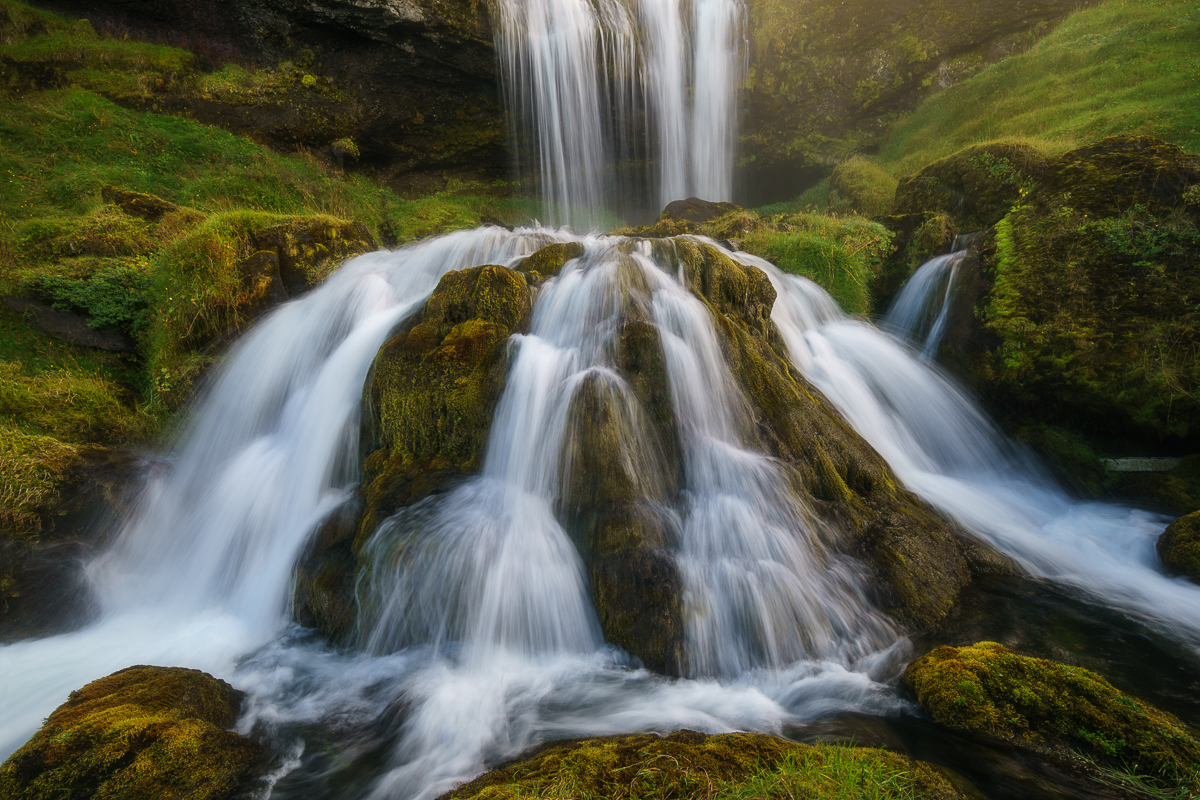
“Quadrophenia,” Iceland, Sony A7RII, 14mm, f16 @ 1/6 sec., ISO 100, polarizer


Great shot and thank you very much for the tips. This may very well be the project for my holiday 🙂
Constructive tips. Thanks a lot!