All photographers are students of light but as landscape specialists we’ve got to be keenly aware of the subtle nuances of light on the landscape, particularly if we want our images to stand out in a crowd of ever-growing landscape imagery. In my last post “Getting Lucky at the Grand Canyon” I included a sunrise shot from Yaki Point on the South Rim of the Grand Canyon. There is nothing nuanced or subtle about the light in that image. It’s bangin’, crazy, intense, insane, super saturated, and whatever other adjectives you care to emote. In many respects those types of shots are easy. As long as you can balance the dynamic range and don’t botch the composition the light does all the heavy lifting. Other times however the light is much more subtle and only the observant photographer will be aware of its presence and in the right place at the right time to harvest something special.
During my recent trip to Arizona I spent a bit of time exploring some of the myriad hikes and vistas in and around Sedona. Cathedral Rocks is probably one of the most iconic formations in this part of Arizona. I knew I wanted to photograph it but I also wanted to come home with something a little less “iconic.” While hanging at the pool with the kids one afternoon I noticed some high clouds beginning to form and progress in the general direction of Cathedral Rocks. I had scouted the area the previous day and had a shot in mind but it would require the right kind of light – Cloud Light.
Cloud light is essentially bounce light coming from the underside of clouds. If the clouds are lit up with the colorful hues of sunrise or sunset they will cast a subtle luminance onto the scene that is quite stunning. Most shots of Cathedral Rocks are taken from the west or northwest at sunset and feature warm, direct sidelight on the rock spires. The sidelight produces contrast, which helps to bring out the beautiful textures and provides definition in the rock surface. However, my chosen perspective would be close to the base of the spires and from the northeast, nearby rock formations all but block any direct light at sunset.
I hiked up to the base of the spires with plenty of time to find a good wide-angle composition. After settling on the composition and getting things set up it was simply a matter of waiting for the light to materialize. In my experience the best scenario to take advantage of cloud light is when the clouds are high and somewhat thin. These clouds tend to catch and reflect the best light well after the sun has set in your location. The higher the clouds the later they light up, sometimes as much as 20-30 minutes after the sun has dipped below the horizon. In addition, once the sun has set there will no longer be any direct light on your subject. Fear not because when the cloud light begins it will bathe your subject in a most luminous glow. You can also accentuate the color and glow by using a longer shutter speed, assuming other conditions like wind don’t warrant something faster.
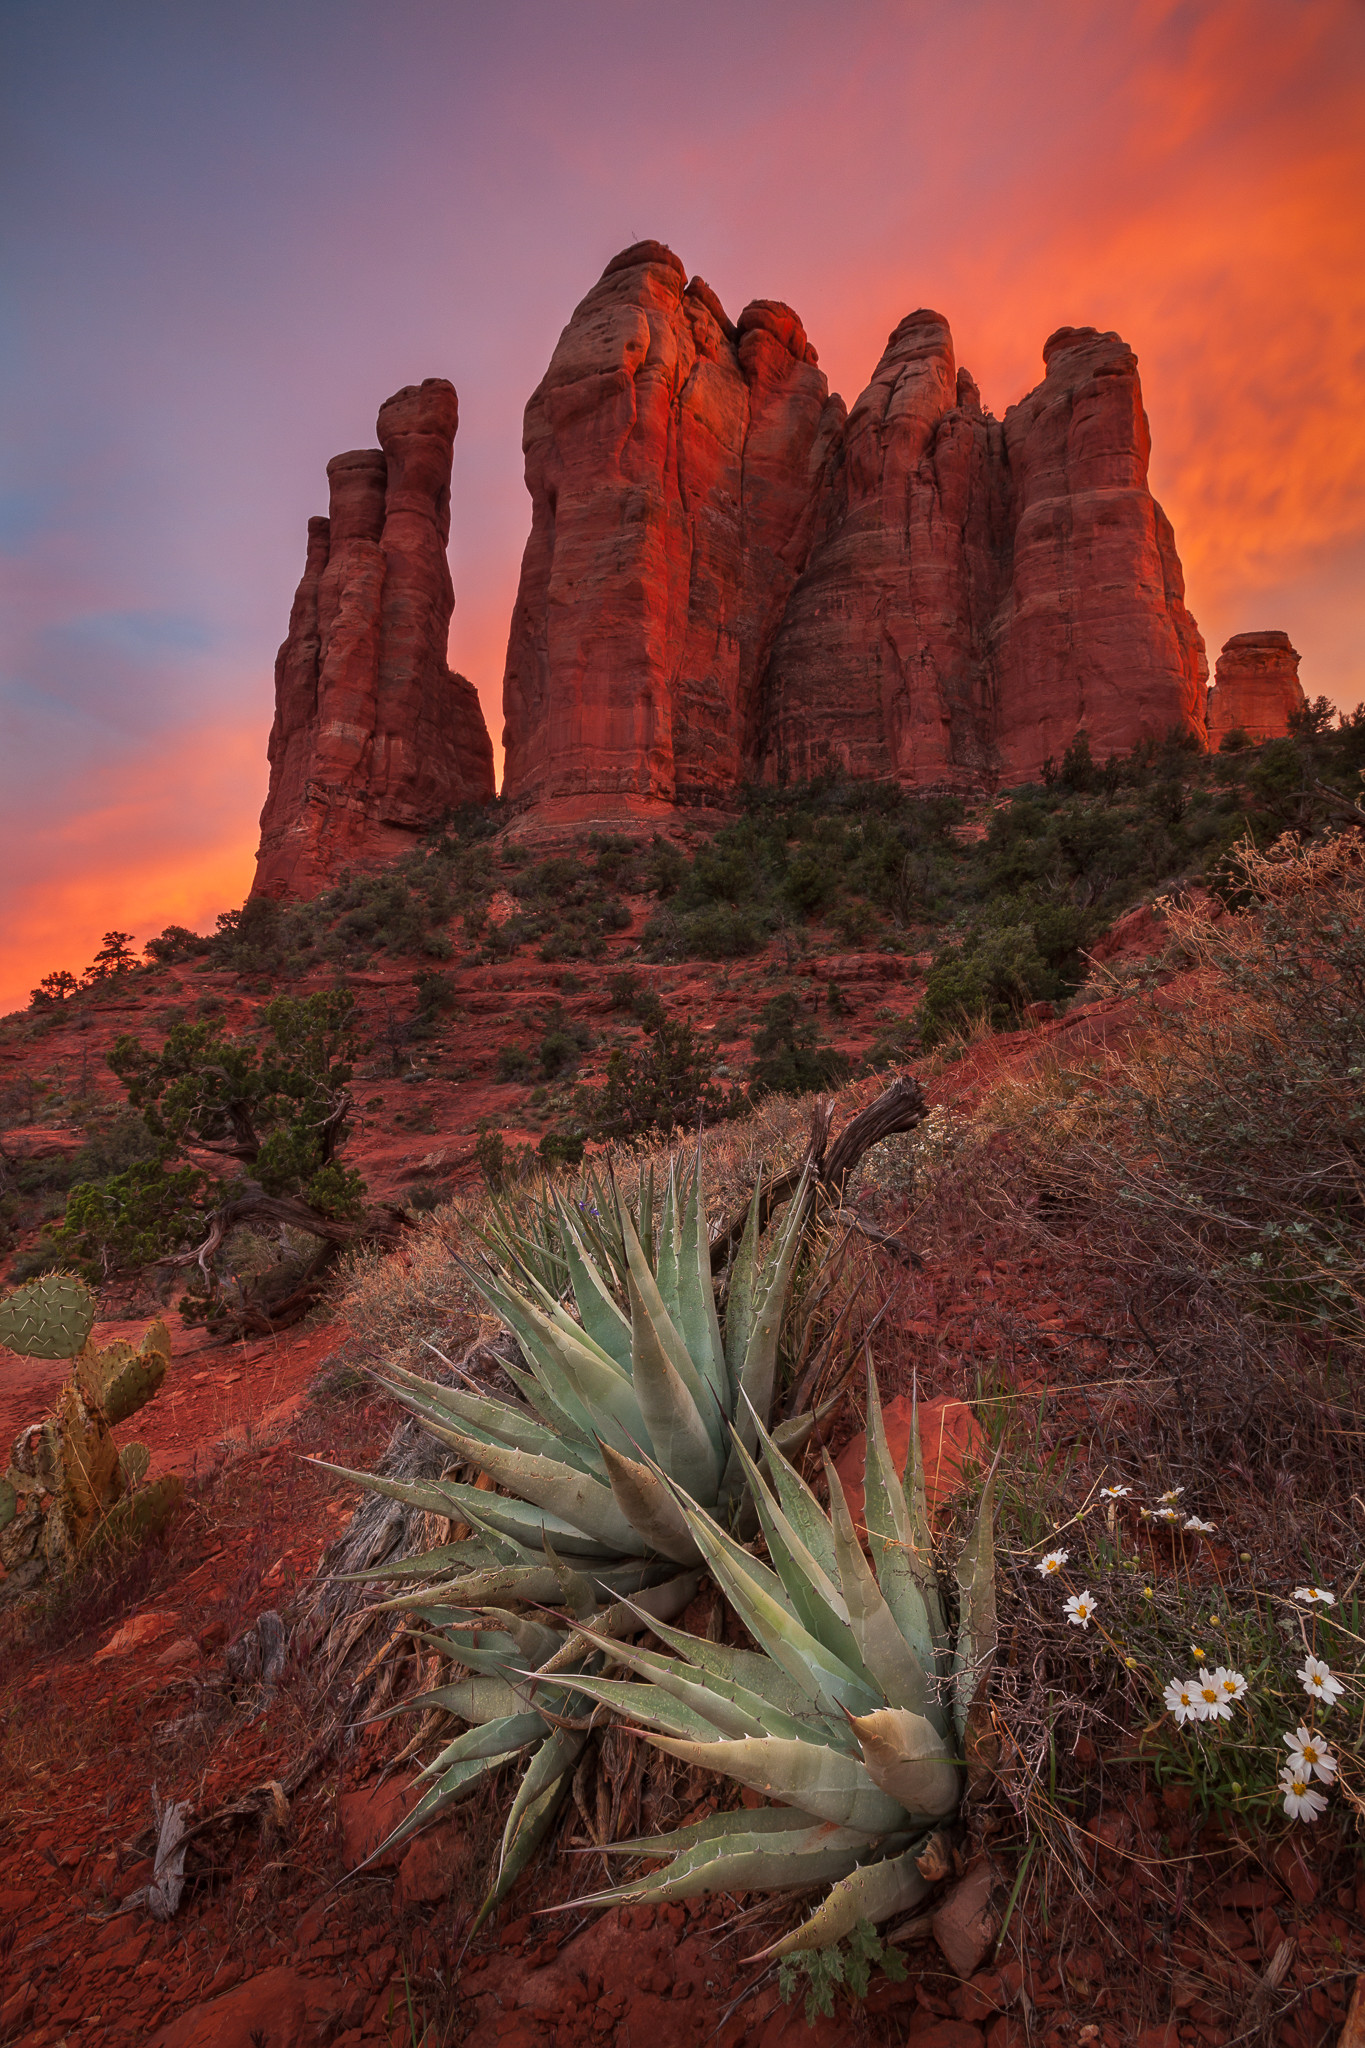
“Cathedral Glow,” Sedona, Arizona, Canon 5DII, 17mm, f22 @ 13 sec. ISO 320
This shot was captured about 15 minutes after sunset and as a result there is no direct light on the spires. All the definition and texture is coming from reflected light, and as you can see, the overall scene is heavily influenced by the pinks and oranges of the clouds. In these circumstances I often switch my white balance from auto to daylight. The auto white balance tends to “correct” the colorcast associated with cloud light (as well as sunrise/sunset light for that matter) and although I can always change it during raw conversion I prefer to do it in the field. There’s something special about seeing all that great cloud light on the lcd once your exposure is made.
So next time you see some high wispy clouds building before sunset it’s time to starting thinking Cloud Light.